Table of Contents
Creating a Vehicle in Blender (Rigging)
In this chapter, we will focus on Rigging — the process of connecting the mesh components of the vehicle to a bone structure so that parts of the vehicle can move independently in Unreal Engine.
Rigging is a fundamental step to enable dynamic movement for vehicle parts like doors, pantographs, bogies, and any other movable elements.
Important Note: This section assumes that you already have basic knowledge of Blender. If you're unfamiliar with Blender's interface, tools, or general 3D modeling principles, please take the time to familiarize yourself with these concepts before continuing with this guide.
What is Rigging in the Context of Vehicles
Rigging is the process of defining how individual parts of a vehicle can move relative to each other.
Unlike characters, vehicles are mostly mechanical objects. This means we usually do not deform meshes smoothly, but instead rotate or move rigid parts such as:
- Doors
- Door handles
- Windshield wipers
- Pantographs
- Bogies and suspension parts
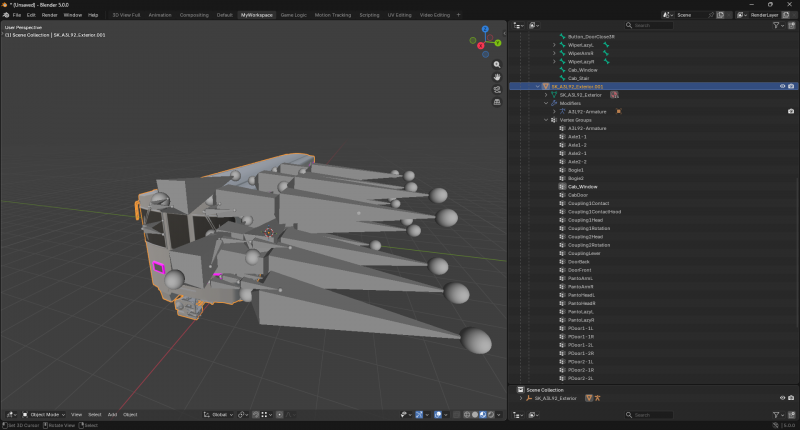
To achieve this reliably and cleanly, SubwaySim 2 vehicles are rigged using an Armature.
Rigging with Armature (Recommended Workflow)
An Armature is a skeleton made up of bones. Each bone controls one or more parts of the vehicle and defines how they move.
All animated parts of the vehicle are rigged under a single Armature, similar to how a character is rigged.
Preparing the Mesh
Before creating the Armature, make sure that:
- All movable parts are separate meshes
- Pivots are placed correctly at real-world rotation points
- Object rotations and scales are applied
- Mesh orientation is correct (X Forward, Z Up)
A clean mesh setup is essential. Incorrect pivots or unapplied transforms will cause issues later in Unreal Engine.
Creating the Armature
Create a new Armature object and begin adding bones.
Important characteristics of Blender bones:
- Blender is bone-based, not joint-based
- The start of a bone defines the rotation point
- The end of a bone defines the orientation
Bones should be placed so that:
- The bone origin sits exactly on the pivot of the mesh it controls
- The bone points in the same direction as the mesh’s local orientation
There is no need to create a separate root bone. The Armature object itself already acts as a root.
Bone Orientation
Bone orientation is critical for correct behavior in Unreal Engine.
Important rules:
- Bone local forward axis is Y Forward
- Bone orientation must match the mesh orientation
- Bone roll must be adjusted correctly
Bone roll can be adjusted in Edit Mode using the *Roll* settings to align the X and Z axes.
Incorrect bone orientation will lead to:
- Inverted rotations
- Incorrect animation behavior
- Problems in Animation Blueprints and Control Rigs
Skinning the Mesh to the Armature
Once the bones are placed correctly, the mesh must be skinned to the Armature.
For mechanical vehicles, we generally avoid smooth deformation. Instead, each mesh or mesh part should be fully controlled by one bone.
There are multiple ways to do this, but when using an Armature, the most common approaches are:
- Parenting meshes directly to bones
- Using Vertex Groups with matching bone names
The exact method depends on the complexity of the vehicle and will be explained in later sections.
Animating with an Armature
One major advantage of using an Armature is animation control.
Because all moving parts are part of the same Armature:
- All animations can be stored in a single NLA strip
- Complex interactions (e.g. door + handle) can be animated together
- Runtime control in Unreal Engine becomes significantly easier
This is essential for SubwaySim 2 vehicles, where multiple systems often move simultaneously.
Export .Fbx
When exporting a rigged vehicle from Blender to Unreal Engine, it is important to note that there is no single universal export setup.
Depending on what is being exported, different FBX export settings are required.
For SubwaySim 2, we distinguish between:
- Export settings for Exterior and Interior meshes
- Export settings for Cab meshes
- Special export settings for Animations
Each of these cases has its own specific requirements and options.
General Export Guidelines
Before exporting any FBX file, always ensure the following:
- Only required bones are present in the Armature
- Bone orientation has been verified one last time
- Transforms (rotation and scale) are applied correctly
For all vehicle-related exports, the option:
Add Leaf Bonesmust be disabled.
Blender automatically adds end bones when this option is enabled. Unreal Engine interprets these as additional bones, which leads to unwanted and confusing “ghost bones” in the skeleton.
Disabling this option ensures a clean skeleton structure inside Unreal Engine.
Export Presets and Screenshots
The exact FBX export settings differ depending on the asset type and are documented in detail using screenshots.
Please refer to the corresponding screenshots in the following sections to ensure that:
- The correct export preset is used
- All required options are enabled
- No unnecessary data is exported
Using the correct export settings is essential to avoid issues later when importing meshes, animations, or setting up Control Rigs and Animation Blueprints.
Exterior/Interior Export Settings:
Cab Export Settings:
Animation Export Settings:
Summary
Rigging vehicles using an Armature provides:
- Clean structure
- Reliable animation control
- Good performance
- Compatibility with Unreal Engine systems
For SubwaySim 2 vehicles, this workflow is the recommended foundation for all further steps, including animation setup and vehicle Blueprint creation.


